Examples of homemade “tool 002” used to disassemble firing pin from Remington 700 ML/MLS bolts
Fred’s original installation documents were copies of some hand drawn depictions of how to install the kit. There was some text and a hand written note to call him if you needed help. The illustration that showed the firing pin being removed labeled what I refer to as tool (7) as “Tool 002” I’m going to keep that nomenclature here to honor the creator of the kit.
The Bolt Tool I made just for 700 ML rifles (aka Tool 002)
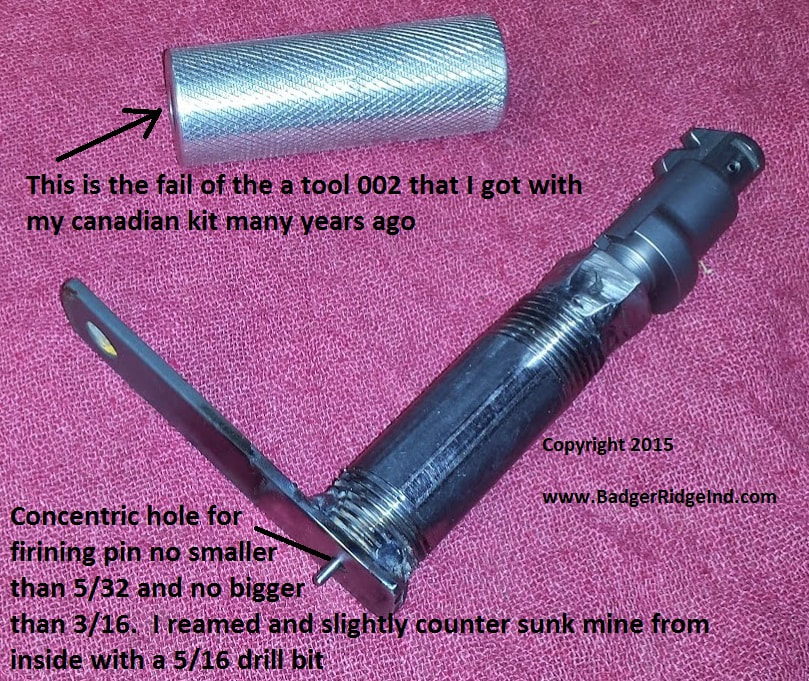
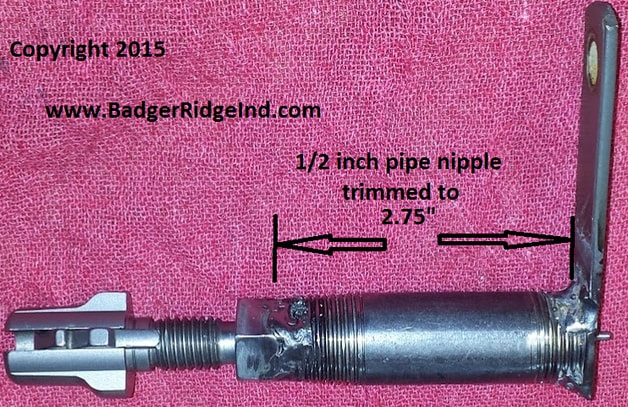
My local hardware store didn’t have 7/16 ID pipe/tubing (like you will see Fishhawk made below). So I got a 3″ long 1/2″ black pipe nipple and a 1/2″x13TPI nut. I ground both threaded ends of the nipple down until it was 2 3/4″ long. This gave me more metal to weld to and made the tool the right length. I blew out all the crud from grinding and welded the nut to the nipple, and then took a piece of flat stock and drilled at 5/32 hole along its center-line. I then welded that to the other end of the nipple so that the 5/32 hole would be concentric to the nut. I ran a 5/16 drill bit through to de-bur and slightly dimple the hole from the inside to better guide the firing pin out when threading onto the firing pin assembly. I then ran a 1/2″x13TPI tap through to clean out the spatter and flash that had gotten on the threads before I ran it up a bolt. This is my favorite version for working on 700 ML rifles
The one Fishhawk made
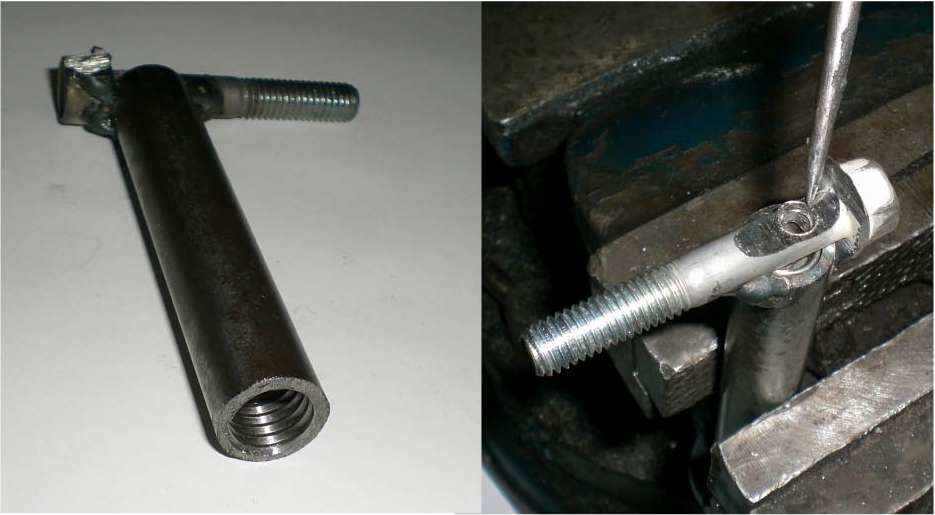
Fish hawk bolt tool: 3.2″ of 7/16″I.D. tubing. Tapped one end 1/2-13 and Welded 5/16″ Bolt across the other end. Drilled hole concentrically through welded bolt to let firing pin through
Later after working on these for a while, and having to work on some other Remington 700 bolts (both long and short action) I made up a tool that will work with any Remington 700 (ML, Short Action, Long Action), along with Model 7’s, 40X’s and others:
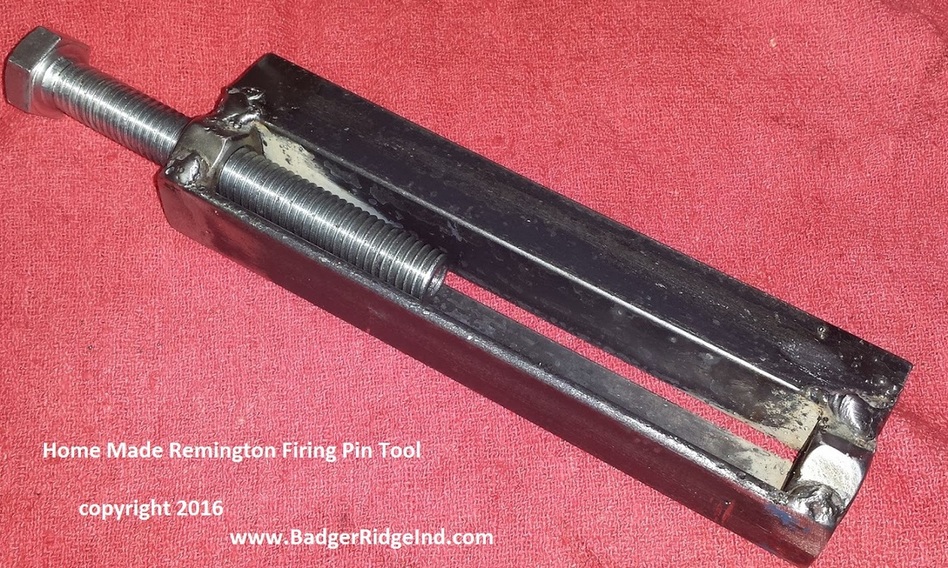
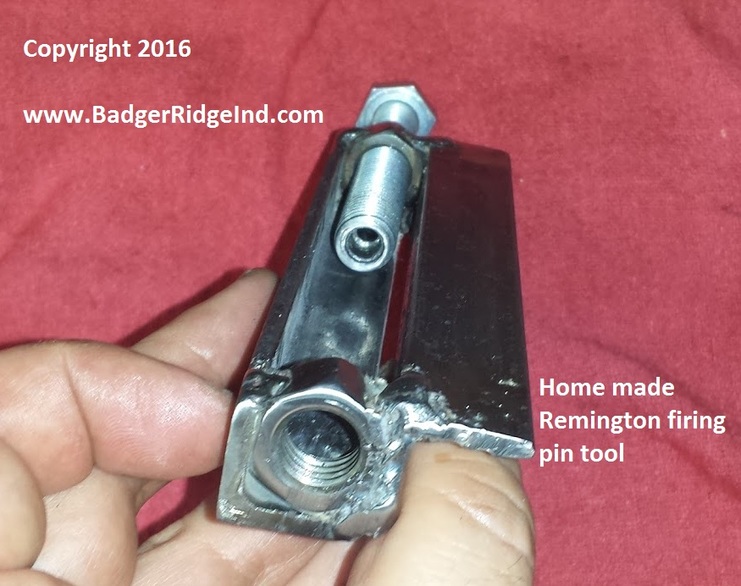
Materials:
-2 – 1/2×13 nuts
-2 Pieces of 1/2 angle, cut to 6″ or 7″ (7 makes it easier on the long action firing pins, but 6″ is workable)
-4″ or 4 1/2″ all thread 1/2×13 bolts. (4 1/2″ is needed to do ML bolts in a 7″ jig). Bore out 1/4″ about 1 3/4″)
You can buy similar tools on line for $30.00 plus shipping. But this seems stronger and better to me.
Also I’m not a welder, all our real welding, like bolt handles is done by professionals.
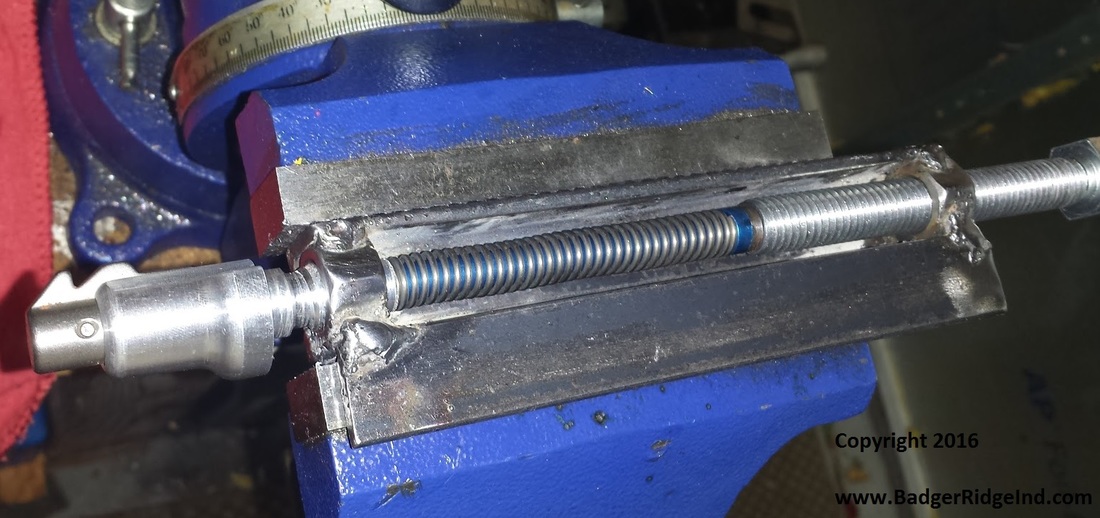
Al R, improvised the tool below when circumstances meant he couldn’t weld:
The Bill of Materials is:
(1) short piece of angle or barstock
(2) #10 ViseGrip pliers
(2) ½-13 nuts (while square is best, heavy hex would be ok, and standard nuts would work)
(1) ½-13 hex head cap screw, drilled to accept firing pin
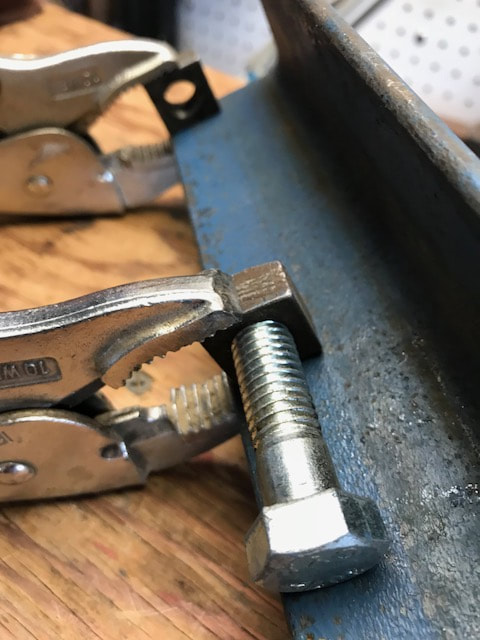
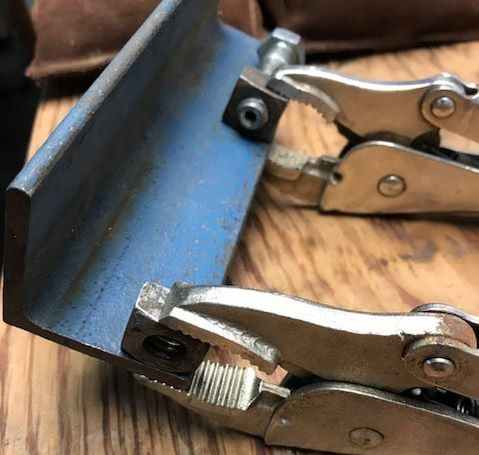
Al R submitted these pics as what he used for a firing pin tool when he couldn’t weld up a tool, I suspect the bolt had to go on the free end as it probably won’t turn like shown here
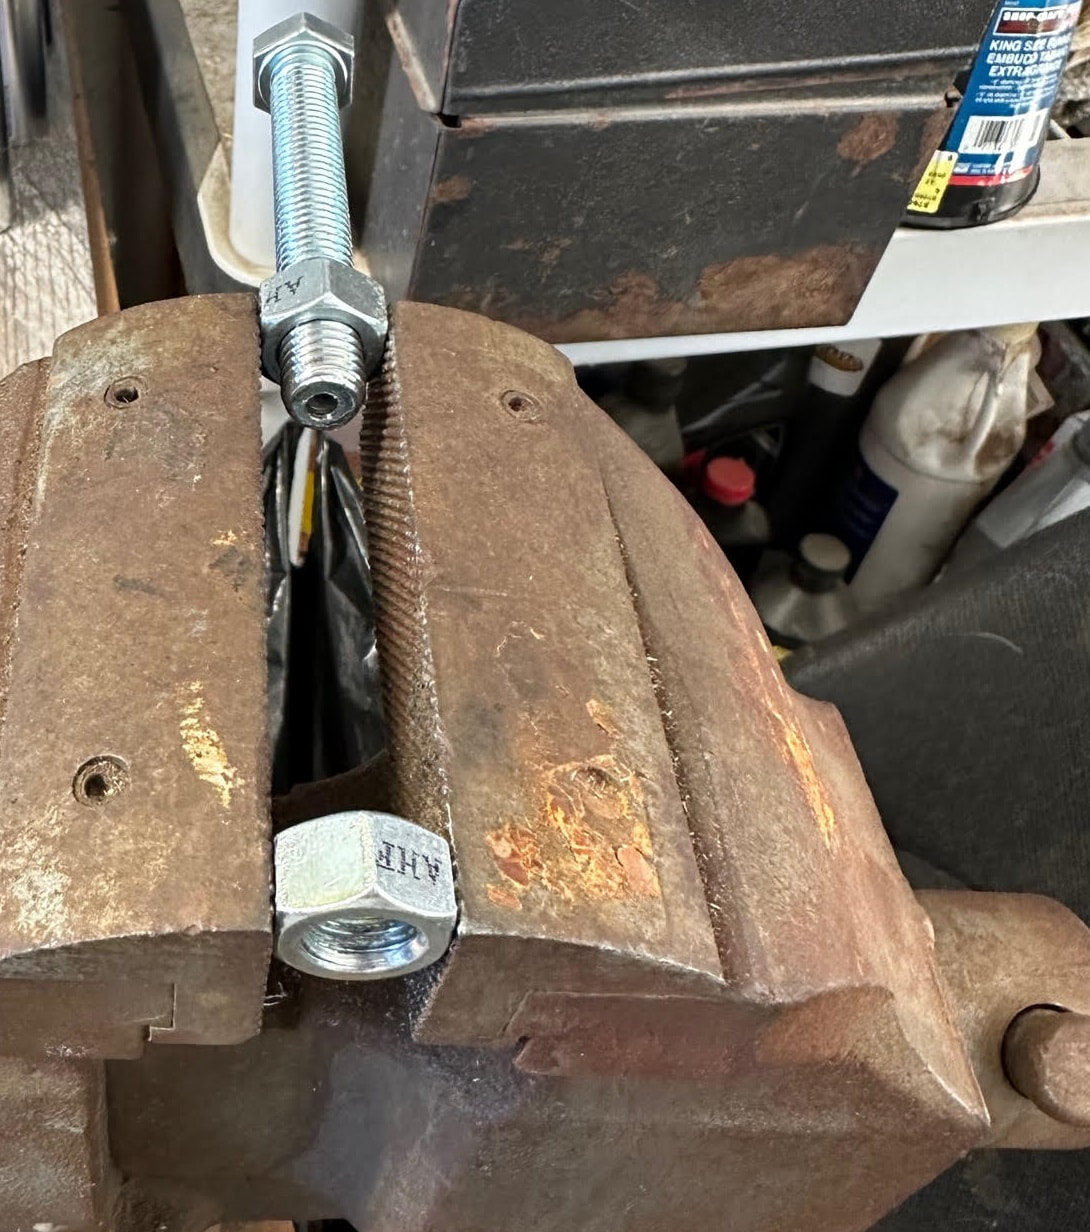
Scott V, another customer, the ultimate one use set up: used his vise & a couple of nuts with a modified bolt.
