Description
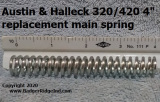
Replacement Main Spring for the A&H in-line (320/420) with leaky, old style, plunger style cap & 209 systems
These brand new Main Springs are made from Stainless Steel or are zinc coated music wire to take the harsh elements a bit better, and have just a little more spring power than the original springs. (We offer two springs for the original percussion cap set up, and all the old style leaky 209 mods!). We’ve found that the length of spring tended to vary in the rifles we’ve torn down (depending on when and where they were made, or what aftermarket mod was put on them). So we offer a 3″ replacement (302 stainless steel) or a 4″ replacement (zinc plated music wire).
To determine which one to buy, tear the bolt down (we give instructions below), then measure the spring. If the old spring is 3″ or under buy the 3″ spring. If the old spring is over 3″ to at or just under 4″, buy the 4″ spring.
FYI: Our sealed breach 209 modification uses the 3″ 302 stainless spring.
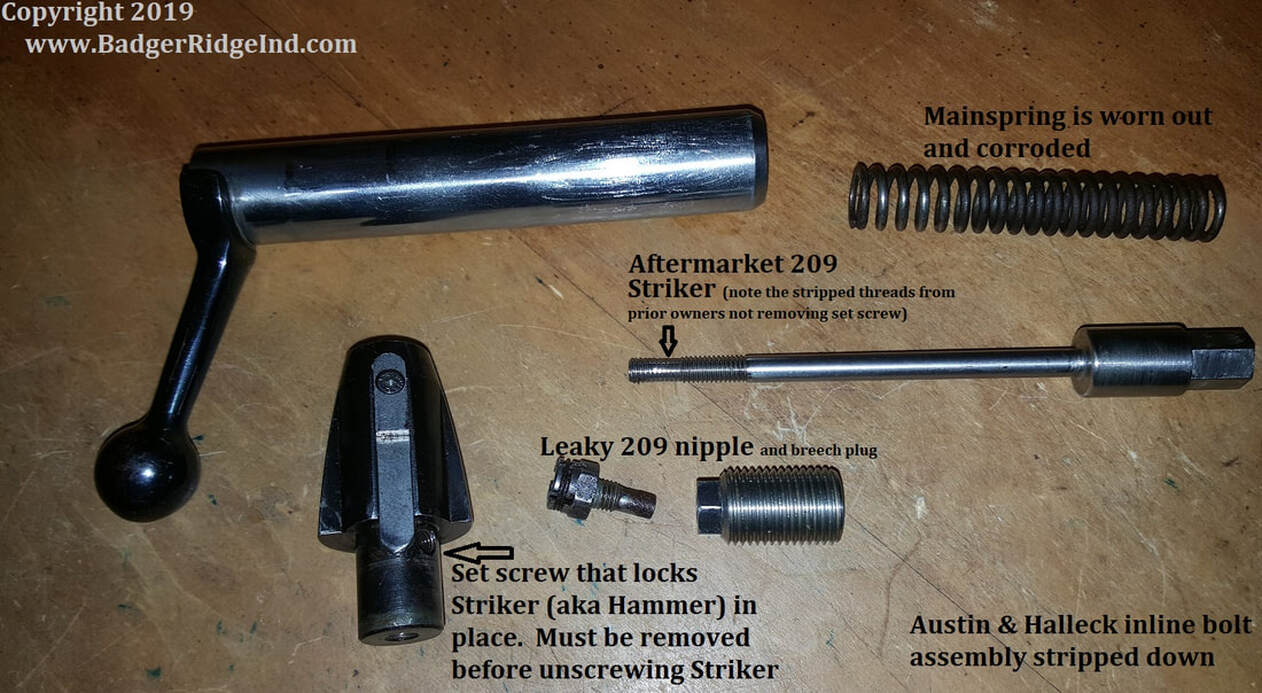
If you have one of these rifles, we really think you should quit fussing with trying to make the old plunger style system work. Too many things go wrong with them. And as soon as you figure out and fix one issue, another will surely pop up. Why keep dealing with blow back getting everywhere? Every time you fire the original set up, you get crud in the bolt and should strip it down and clean it afterwards. And most of the bolts I’ve seen for these old rifles have the threads stripped off of the firing pin from folks not removing the set screw before trying to take the striker out… We were working on a better way! I keep hoping to revive it, but alas everything else comes before development of the new niche product.
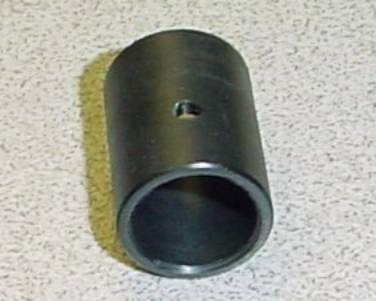
How to strip the bolt down to clean & install this replacement Main Spring
1. Review the Austin & Halleck inline owner’s manual (click here to download it in PDF) and ensure the rifle is unloaded, on safe then remove the bolt.
2. Remove the weather shroud from the front of the bolt (if installed) .
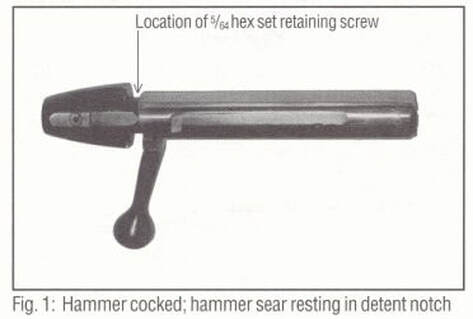
3. Use a hex head wrench to remove the set screw on the bolt plug (accessible through the cocking notch… it locks the striker in place). Manual says 5/64, but this is a metric screw (and they used two different sizes, so I’d try 2mm or 2.5mm hex head as well).
CAUTION: Working on the bolt and/or twisting of the striker can cause the bolt plug to snap forward to the de-cocked position. It is easy to get flesh caught in there and smash it!4. Unscrew the striker from the front end of the bolt (percussion cap’s have a coin slot, 209’s usually have hex heads). This may be difficult if the set screw mashed the threads. It’s easier if you let the hammer sear fall into the cocking notch and keep it there while taking the firing pin out.
- NOTE: Once the firing pin is out the bolt plug will fall freely from the bolt, as will the main spring.
- NOTE: It is recommended that a M6x1.0 tap be used to chase and refresh the threads on the firing pin and using a M6x1.0 die to refresh the mashed threads on the firing pin, before reassembling.
- NOTE: If the threads are mashed and its tough to take the striker out, putting the bolt plug in a vice with padded jaws helps.
5. Clean all debris, and lube the assembly. Be sure to use lubricants that do not gel with cold, or miss fires are probable in cold weather. I prefer dry PTFE lubes on my bolts, but I also don’t shoot these leaky systems… all my rifles are sealed breech…. anyways
Reassembly is the reverse of disassembly. It is best to either keep the bolt plug in the cocked position (see figure 1 above) during assembly or have a vice with padded jaws available to cock the assembly.
- NOTE: You must set the hammer/stricker/firing pin to the proper protrusion (see owner’s manual) to ensure proper contact with the percussion cap nipple/209 primer holder. For the original percussion cap set up, the front of the Hammer (Striker) is set even to the front of the bolt body’s mouth when in the cocked position (per the owner’s manual). I think the 209 set up pictured above was supposed to be the same.
(I know… how can someone write so much about a simple spring?!?!?! I hope it helps someone to realize there is a better way, or at least to stop stripping the threads on their striker!)

Reviews
There are no reviews yet